Friday, January 27, 2012

My Valentine's Wreath

Ok, expect this to be my last Valentine's Day post.  Seriously, I'm not doing ANY more.  Ok, I might have to do some related baking, but that.is.it!  I've met my quota. Jeesh, it is a very minor holiday, right? 

I posted on my Valentine Vignette yesterday and promised you a look at the wreath I made.  I do like to put something on my front door for each holiday...I'm not so grinchish in that regard.  I haven't done anything for Valentine's Day so...shut the front door!...haha, I came up with this down and dirty wreath. 

It was so simple to put together, it's a bit laughable, but simple has been my style lately.  Life with a newborn gives me about 30 minutes for the completion of any project.  For this reason, this little wreath was right up  my alley.

I got some Valentine's themed fabric at Joann's for 30% off.  I cut it into a few strips and started wrapping it around an inexpensive straw wreath.  Oh yeah, I broke out the big bucks for this one!;)
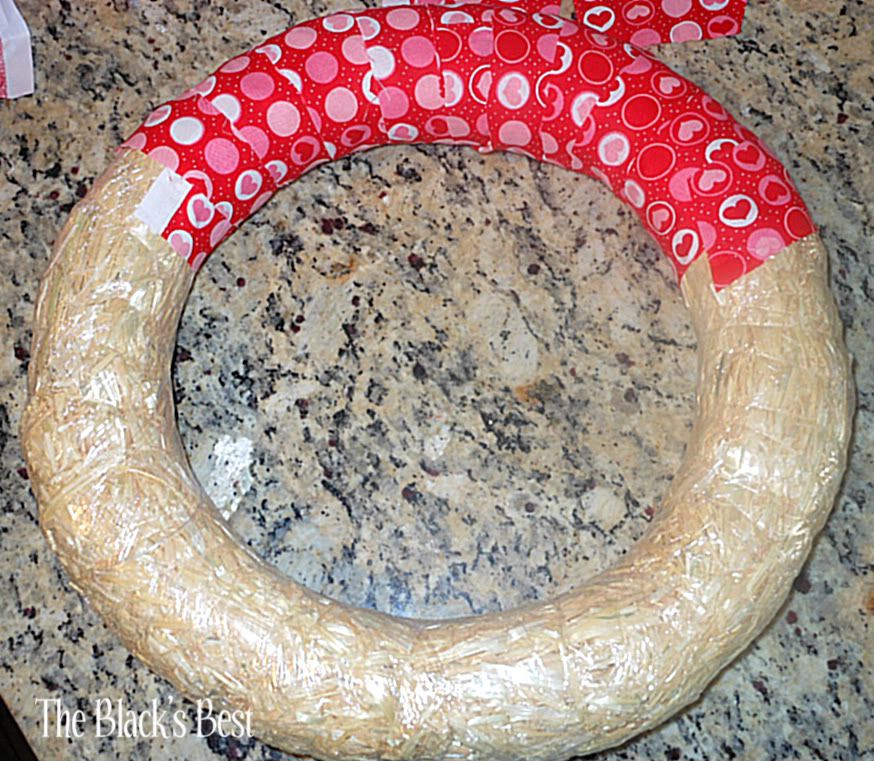

Photobucket


Then I decided it needed some more googaas and I've been admiring all of the yarn wreaths out there.  Again, I was too lazy or time deprived to wrap the whole wreath so I just did a few sections of yarn.  I added a bit of ric rac too.  Finally, I added an ornament and some sparkly foam hearts (from Joann's again) and I was done.  It's all stuck together with some of the best stuff on earth...hot glue
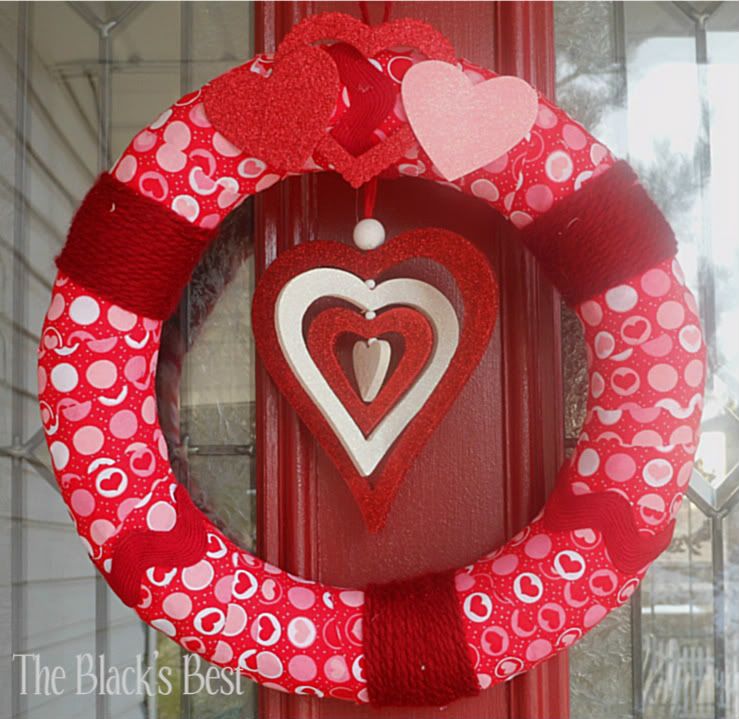

Photobucket


I now have a little bit of Valentine's on my front door and I "look" festive for the neighbors.  Of course, that's all a front. 

post signature
Linking to:

Tatertots and Jello
Addicted 2 Decorating 
Funky Junk Interiors 
Positively Splendid 
Sisters of the Wild West 
DIY Showoff 
Design, Dining, and Diapers 
Toys in the Dryer

Thursday, January 26, 2012

Valentine's Vignette

I wasn't going to do any decorating for Valentine's Day this year, but I just couldn't resist after seeing all of the adorable stuff on Pinterest and around blogland.

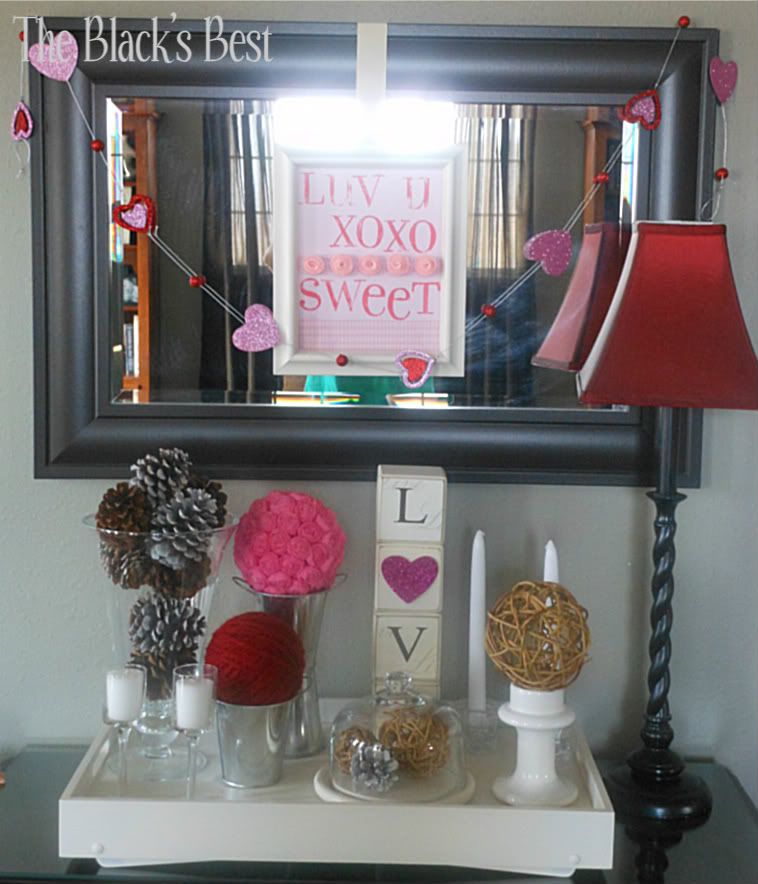
I used some things from last year and added in some new stuff to get what I think is a cute little vignette.  I don't have a fireplace with a mantle (one of those someday wishes) to decorate so this chest by my entry gets most of my seasonal attention .  I hung this sign that I made last year from the large mirror over the chest. The lettering and little felt rosettes are fun, so I had to use it again!

The sparkly heart garland was rehung to.  Why reinvent the wheel if what you have works?


Photobucket

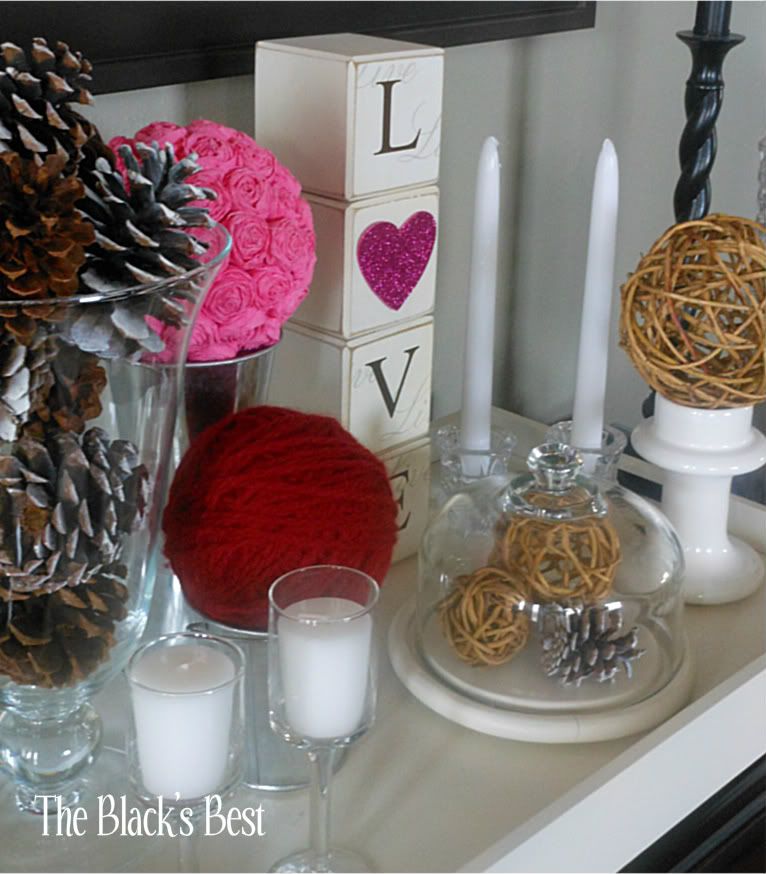
I added a few natural elements in with pine cones left over from Christmas and some woven balls.


Photobucket

The rosette ball was made last year, but I nested it in some silver buckets found in the dollar section at Target and stacked bottom to bottom.  I also made a yarn ball and put it into another bucket.  Can ya tell I kind of liked these?  The red yarn is left over from a Valentine's wreath I'll show you tomorrow.


Photobucket

I staged it all on my white tray and threw in some candles, a cloche, and some blocks spelling what else?...L.O.V.E.  The only thing new is the yarn ball...the rest was fareee because I had it on hand!  Gotta love it!


Photobucket

 It's just a bit of decor on my "mantle" to celebrate the holiday.  How many of you decorate for Valentine's Day? Do you go all out or just do a little?

Even though it took some convincing, I kind of enjoyed my little decorating attempt!

post signature
Linking to:

Home Stories A to Z
Delightful Order 
The Shabby Creek Cottage 
French Country Cottage 
Stuff and Nonsense 
At the Picket Fence 
2805 
The Charm of Home 
My Romantic Home 
Tatertots and Jello 
Addicted 2 Decorating 
Funky Junk Interiors 
Positively Splendid
Sisters of the Wild West
DIY Showoff 
Design, Dining, and Diaper

Sunday, January 22, 2012

Sprinkle Obsessed

About a week ago I made some cupcakes to take to Will's class for his birthday.  They were blue with sprinkles and Max watched the whole time I was decorating them.

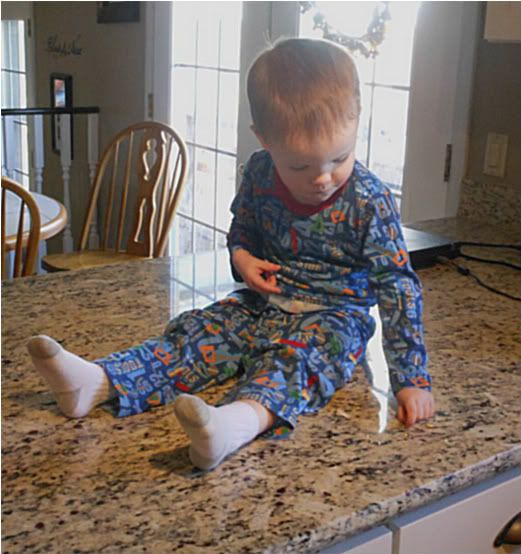
I walked out of the room...probably to do more of my never ending laundry...and I came back to this.  Max sitting in the middle of the counter picking up and eating the sprinkles that I hadn't cleaned off the counter yet.  

He's my little hoover vacuum.  Luckily, I'd put the cupcakes up where he couldn't reach and demolish them.


Photobucket

I think he got into the Cutie oranges I have in the fruit bowl too, because I've found several this week with big bite marks in them.

He noticed that I was taking his picture and gave me this centerfold shot.  What am I in for when this is what I get at 2 1/2 years old?
Photobucket

He never makes me stop laughing!  Thanks for letting me share.:)


post signature

Friday, January 20, 2012

All About Baby

I apologize for all of the baby centered posts lately, but hey, I have a newborn and life revolves around him.  I made these burp cloths right before he came.  It's just taken me a couple of months to get the pictures taken and actually get them into a post.

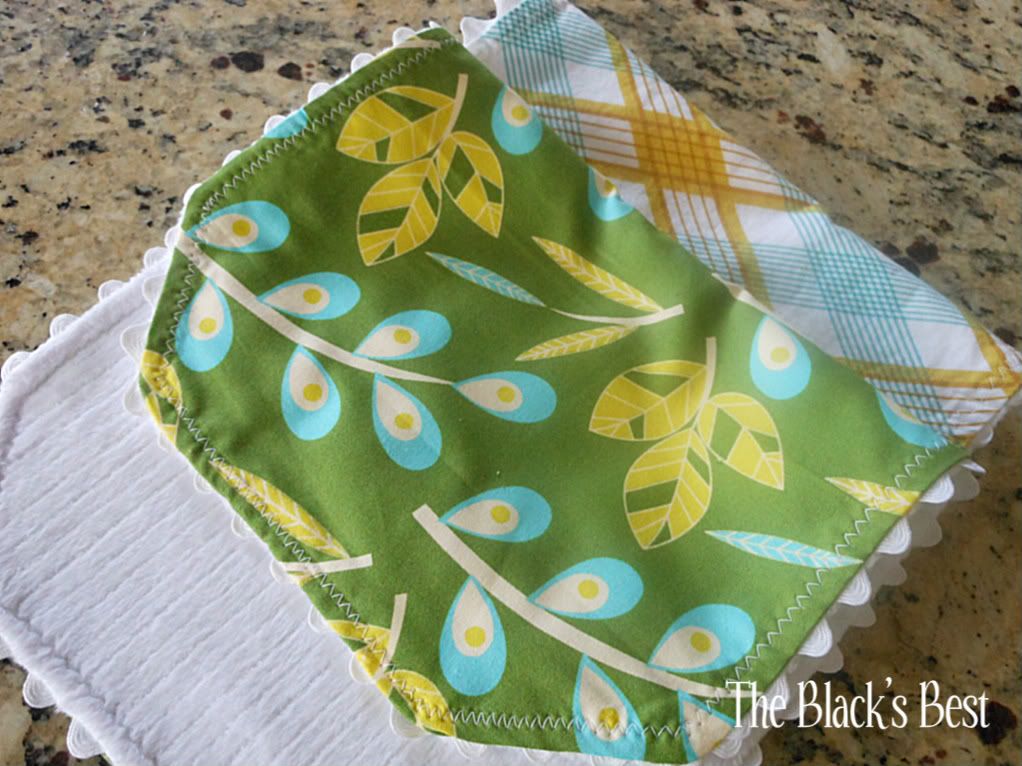
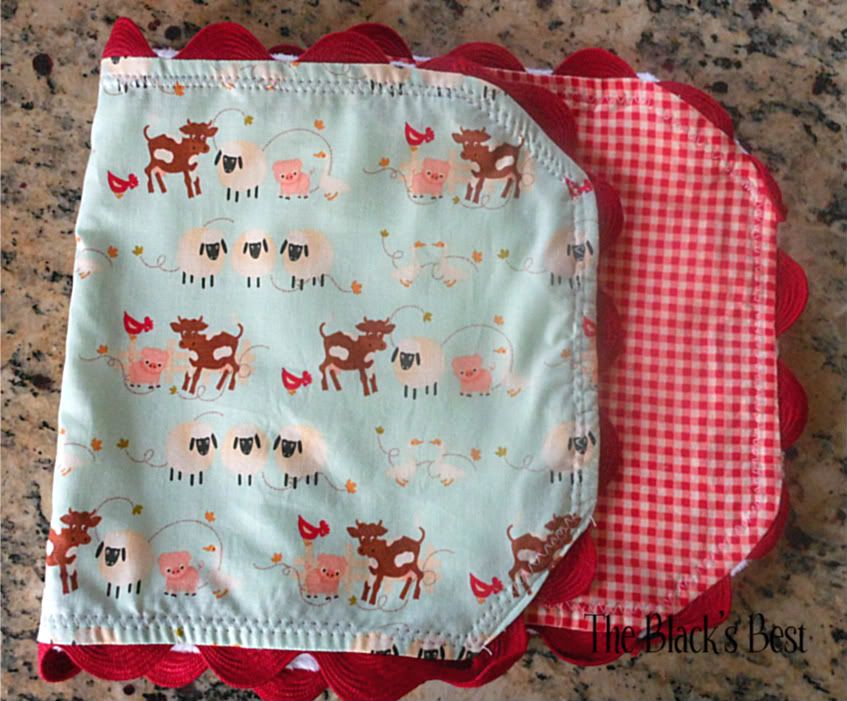
I really like how they turned out though.  All of them have an absorbent minky fabric on one side and then a fun (at least I thought so) printed cotton on the other.

They were fairly easy to put together except for the ric rac trim.  It was a pain in the rear end and no matter how hard I tried, I couldn't get the amount sticking out from the edge to be consistent, so just don't look too close!


Photobucket


I made three sets of burp cloths each with coordinating fabric.  This one with the farm animals and gingham check is my favorite though.  Aren't those little pig, sheep, and cows adorable? 

I know you're thinking I'm a bit hormonal still since I'm a bit over the top about these, and you may just be right.  Oh well...I still L.O.V.E the fabric!  I've also gone a bit bonkers over huge ric rac.  It makes me smile.


Photobucket


You may have also noticed I didn't use your typical baby blues and soft greens that you see on so many thing made for baby boys.  I was just a bit over it this time around since Jack was boy number four.  Instead, I really loved the bright, fun colors that pop.  

Honestly, if girls get those fun bright pink colors all over blog land, why can't my boy have some bright orange?


Photobucket


I had a blast making something so practical just a bit more fun and original.  Please understand, it's the only excitement I'm getting lately. :)

post signature
Linking to:

Addicted 2 Decorating 
Tatertots and Jello 
Be Different Act Normal 
The Shabby Nest 
Funky Junk Interiors 
The Grant Life 
Positively Splendid 
Sisters of the Wild West 
Nifty Thrifty Things 
DIY Showoff 
A Simply Klassic Home 
Raising Oranges 
One Artsy Momma 
Home Savvy A to Z 
DIY Home Sweet Home 
Get Outta My Head Please 
Between Naps on the Porch 
Today's Creative Blog 
Coastal Charm 
I'm Topsy Turvy 
Home Stories A to Z 
Not Just a Housewife 
A Bowl Full of Lemons 
Delightful Order

Wednesday, January 18, 2012

Better Than Mom's!

Back when I was a kid my mom used to make this stuff called goulash.  I really hated the stuff (sorry mom).  Her version was pretty much hamburger, elbow macaroni, and something runny and tomatoey (yes, it's a word:)).

Well I've come up with a version of my own that has the base of her goulash but is dressed up a bit.  Don't worry, it's also extremely quick and easy.

Boil some water.  Easy so far, right?  Add a good pinch of salt and about 1 1/2 c. of elbow macaroni.

Pull out your ground hamburger or turkey.  I used turkey this time around.  Throw in about 1/2 of a chopped onion and a couple of chopped garlic cloves.  Brown it all up.


Then you will throw in a can of diced tomatoes, 2 small cans of tomatoe sauce and some chili powder, cumin, salt, and pepper.


Mix it all together and heat it through.


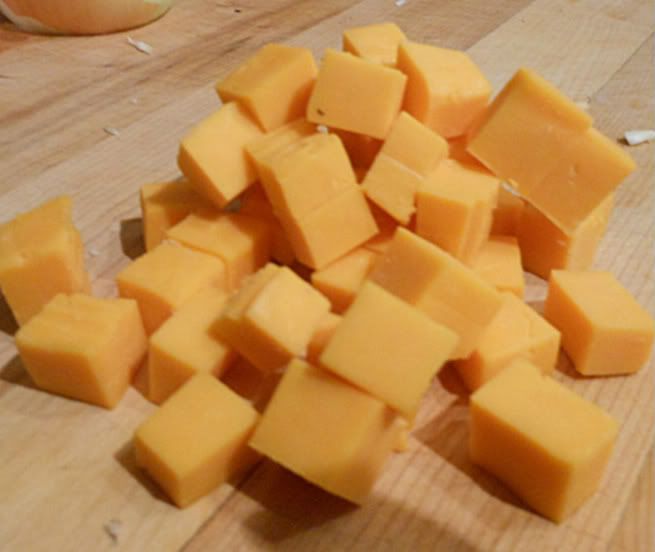
Get some cheese.  I used about 6 ounces of medium cheddar and cubed it.


Photobucket


When your pasta is done, toss it and the cheese into the pan with the the meat and tomatoe mixture.


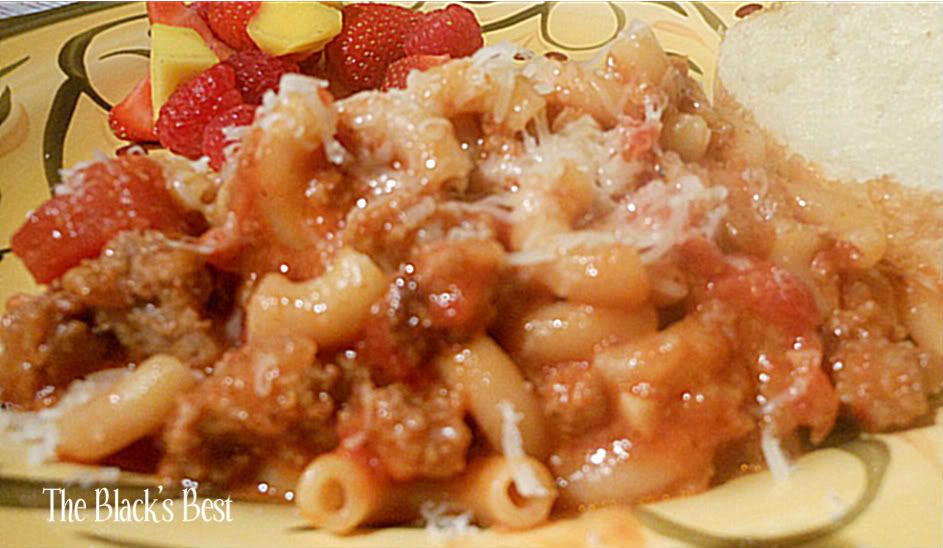
Combine it all together until the cheese is melted in and the pasta is well coated.  This usually takes about 5 minutes or long enough to referee my crazy boys.

Top each individual serving off with some grated parmesan.


Photobucket
 
This is definitely what I would call comfort food and it packs a bit more zing than mom's boring old goulash.  I mean it actually has some spices added.  In fact, maybe it deserves a better name?  Ideas?

Here's the recipe:
1 lb. ground hamburger or turkey
1/2 chopped medium onion
2 cloves garlic, chopped
1 Tbsp. chili powder (more if you want more heat)
1 tsp. cumin
1 14.5 oz can of diced, peeled tomatoes
2 small cans of tomatoe sauce or one large can
1 1/2 c. of elbow macaroni
Approximately 6 ounces of cubed cheddar cheese.
Salt and pepper to taste.

Boil pasta in salted water.  While pasta is cooking, brown and break up the meat.  Add the onion and garlic and continue to saute for approximately 3 to 4 minutes.  Add in the diced tomatoes, tomatoe sauce, cumin, chili powder, and salt and pepper.

Once the pasta is al dente, add it to the meat and tomatoe mixture along with the cubed cheddar cheese.  Heat it all through for about 5 minutes.  Serve.  This comfortably feeds 6 people.

I serve this up with some crusty french bread and either a tossed salad or fruit.  Everyone in this family loves it!
post signature
Linking to:

Savvy Southern Style
Oopsey Daisy 
Blue Cricket Design 
Someday Crafts 
House of Hepworths 
The CSI Project 
Delightful Order 
The Shabby Creek Cottage 
Somewhat Simple 
Here's to Handy Andy 
French Country Cottage 
Stuff and Nonsense 
Tidy Mom 
Tatertots and Jello 
Sisters of the Wild West 
Serendipity and Spice

Wednesday, January 11, 2012

Quick Fix

Do you ever try to do something good, it turns out bad, but then you fix and it's better than where you started? 

I know, I know, this sounds a little convoluted but let me explain.
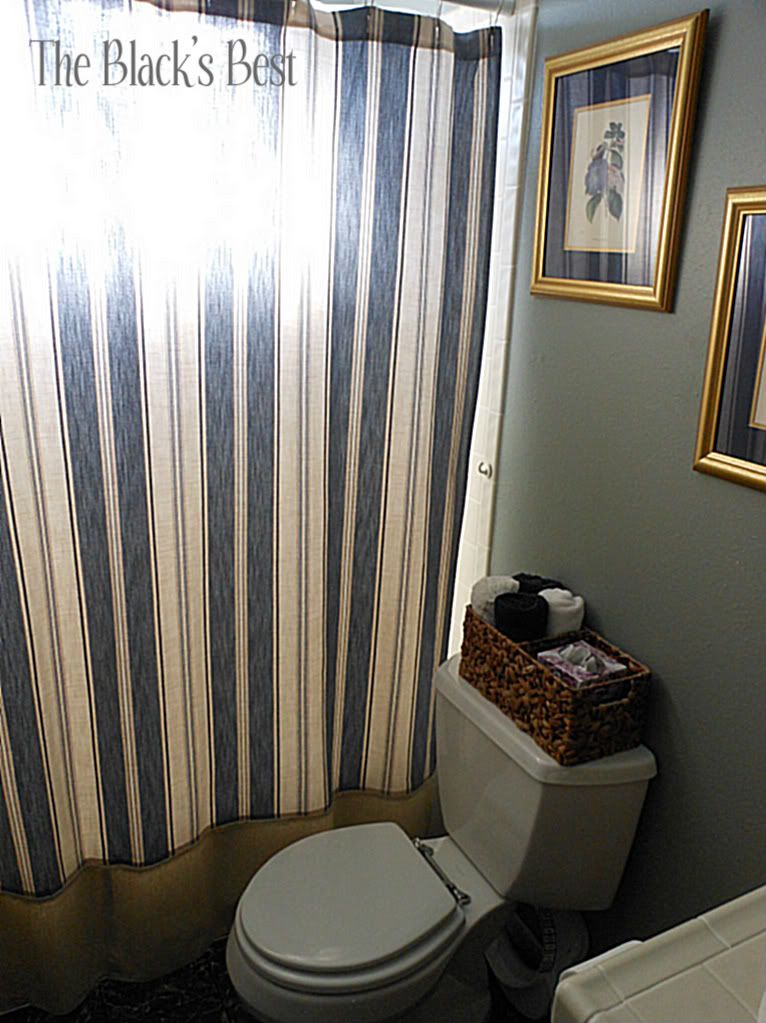
I bought this great blue striped shower curtain about 3 years ago when we were showing our last home for sale.  I loved it when I bought it.  Now I'm going to admit something and don't judge me please...I washed this shower curtain for the first time a couple of months ago.  I admit it's gross, but to give myself some credit, this had been very rarely used since my boys take baths, not showers.

Plus, I'm glad that I hadn't washed it since after the.very.first.wash (piece of ****) the thing shrunk up about 4 inches!  It looked horrible.  Ya know, like flood pants except in shower curtain form.  Did I mention I can't stand to see anyone in pants that are too short?  Just a bit of my OCD showing.

Well, I came up with a solution since I really didn't want to spend any money on a shower curtain.  I also still love the blue stripes of the short one.  What to do?  Well remember the drop cloth I bought for the guest room curtains?  I just happened to have a bit left over.  I just sewed my extra drop cloth material onto the bottom of the shower curtain.  The brownish color of the drop cloth happens to be the same as some of the thin stripes running through the curtain.  A very happy coincidence. 


Just disregard the horrible flooring in this room.  It's another one of those projects on my "list".

I think I might actually like the shower curtain better now than what it looked like originally.  So see?  This went from good to bad to better.  I love it when than happens.  Mostly, because things just don't work out for me this way very often. :)


Photobucket


Full length goodness...I'm happy.

  It's even better that this fix only took me about 20 minutes, and didn't cost a dime!

Teaching myself to sew is working out for me so far.  I can't believe it took me so long.

post signature
Linking to:

The Shabby Creek Cottage
The 36th Avenue 
Somewhat Simple 
House of Hepworths 
Tidy Mom 
The Shabby Nest 
Remodelaholic 
French Country Cottage 
At the Picket Fence 
2805 
Tatertots and Jello 
Bear Rabbit Bear 
Addicted 2 Decorating 
Chic on a Shoestring Decorating 
Whipper Berry 
The DIY Showoff 
Between Naps on the Porch 
DIY Home Sweet Home 
My Life With 3 Littles and 1 Big 
You Are Talking Too Much 
Home is Where My Story Begins

Saturday, January 7, 2012

Experimental Gift

You know what...I have a great sister-in-law who lets me experiment on her and her stuff. She just happens to have a DSLR camera (Jealous, who me?).  I have seen camera strap covers all over the internet and I was dying to try out this little sewing project.  Unfortunately, my point and shoot really has no need for a camera strap.

One of the tutorials I found was right up my alley and seemed simple enough.  I found this camera strap tutorial over at Fun to Craft and was loving how cute it was.  I bought some fabric, you need very little, and got started.  This was supposed to be a birthday gift, but really it just gave me something fun to do.;)

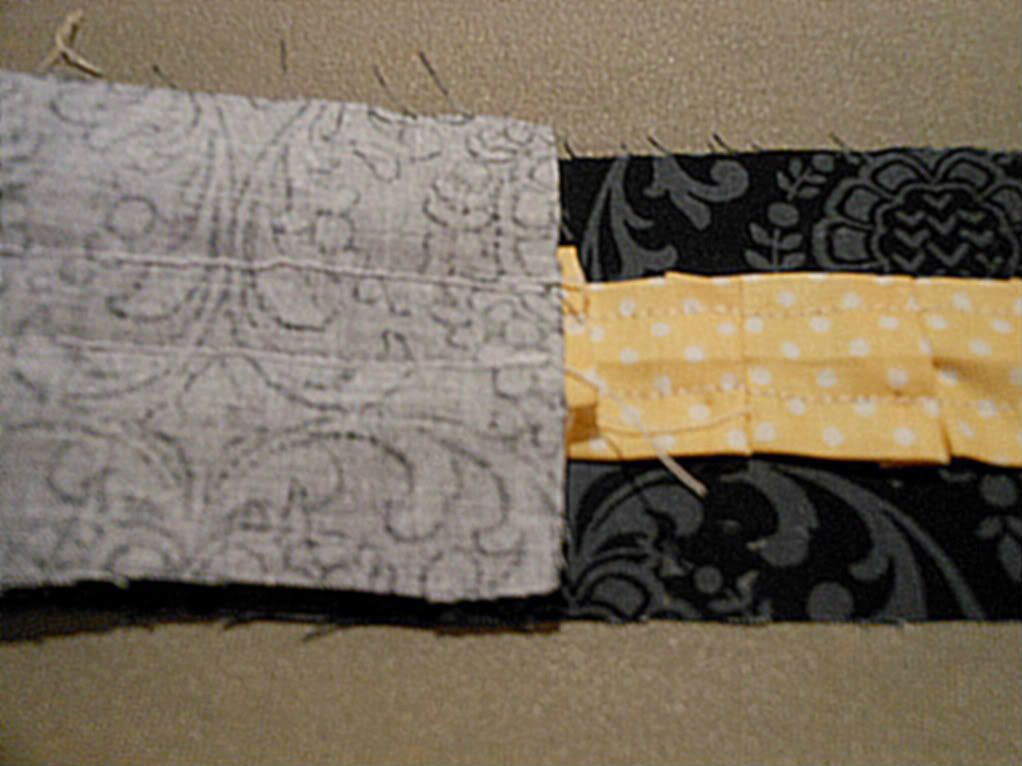
Start by cutting a strip of fabric 1" wider (1/4 to 1/2" seem allowance), and about 1/2" longer (1/4" seem allowance) than the camera strap you are wanting to cover.  The black fabric in the picture below is what I chose.  Cut the minky fabric for the back of the cover with the same dimensions.


For the ruffle I chose a cute polka dot yellow.  I probably made it twice as long as my background piece.  You'll want this piece to be narrower than the background.  Iron both edges into the center.


At this point just start folding the ruffle and pinning it to the background piece.  After it is all pinned in place, sew down both sides of the ruffle to secure it.


Photobucket


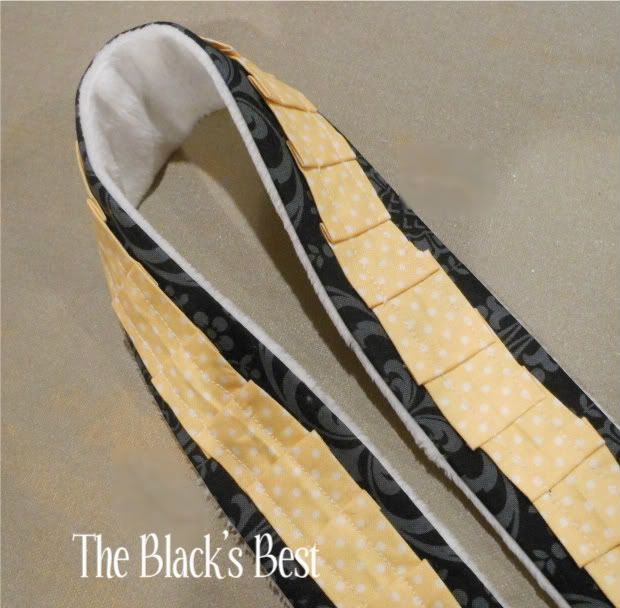
  Put a small 1/4" hem on the short end of the minky piece and black/ruffle piece.  Then put both pieces together right sides in and sew down the sides.  Hopefully, that makes sense.  Then just turn it inside out.

Here it is all sewn together.  How do you like the shadow puppet hand in the picture?  Oops!


One more view that shows the back a little better.  This really was easy to put together.  The worst part was getting the ruffles somewhat uniform while pinning.  Thank goodness this doesn't need to be perfect.  In fact, I kind of like the imperfection of the ruffle


Photobucket


The only thing I would do differently is make it all a little wider.  Then it would slide on the strap a bit easier and I could get a stupid lense cover pocket onto the strap!  Grrrr!  Don't worry though, the above tutorial takes that into account.  If you are interested in doing a lens cap, check out Fun to Craft.

Thanks for letting me experiment sis-in-law!  I had fun!


post signature
Linking to:

Positively Splendid 
The DIY Showoff 
DIY Home Sweet Home 
Between Naps on the Porch
Boogieboard Cottage 
Three Mango Seeds 
Pinkapotamus 
A Bowl Full of Lemons 
Home Stories A2Z 
Coastal Charm 
Sugar Bee Crafts 
I'm Topsy Turvy 
Today's Creative Blog 
Not Just A Housewife 
Savvy Southern Style 
Oopsey Daisy 
Blue Cricket Design
The Thrifty Home
Someday Crafts 
The Shabby Creek Cottage 
The 36th Avenue 
Somewhat Simple 
House of Hepworths 
Tidy Mom 
The Shabby Nest 
Remodelaholic 
French Country Cottage 
At the Picket Fence 
2805
Tatertots and Jello 
Bear Rabbit Bear 
Addicted 2 Decorating 
Whipper Berry

Thursday, January 5, 2012

Late As Usual

Ok, ok, I know that Christmas is over and done with and believe me I'm pretty relieved all of the craziness is over and life can settle back into its normal routine.

BUT, I just had to share this cute little idea I got off of Pinterest.  I immediately (ding, ding, ding in my head!) thought this would work for gifts.

 
(http://www.myrecipes.com/recipe/peppermint-stick-cocoa-10000001011199/)

Of course, I made a few changes for reasons of cost effectiveness.  The container used above is in a cute little quart jar which is great if you are only giving 1 or 2 of these (I did find them at Walmart if you want to use them).  However, I think I made up about 10 of them.  Soooo, I went with the less expensive pint canning jar.  One of these little jars still makes 6 servings of peppermint hot chocolate.

Now here is the reason why I decided to go ahead and share this little project.  (Beside not having the time to write the post 2 weeks ago.)  Wouldn't these be adorable for V-Day too?  Just swap out the bow with something pink or red and voila, a cute little treat. I mean Valentine's Day IS still in the middle of  stinkin' winter.  At least it is in my neck of the woods.

Here's the recipe I used for the pint jars, just double it if you are going with the quart size.
-1/2 c. powdered milk
-1/2 c. unsweetened cocoa powder
-1/2 c. granulated sugar
-1/4 tsp. salt
-1/4 c. miniature chocolate chips
-1/4 c. crushed peppermint candy

Layer the powdered milk, cocoa powder, sugar, salt, chocolate chips, and  peppermint candy.  Instructions:  Mix all ingredients together.  Combine 1/3 cup of hot chocolate mix with 1 c. boiling water.  Store unused portions in air tight container.


post signature
Linking to:

At the Picket Fence
French Country Cottage 
Stuff and Nonsense 
2805 
Addicted 2 Decorating 
Delightful Order 
The Shabby Nest 
Tidy Mom 
Tatertots and Jello 
A Southern Fairytale
Related Posts Plugin for WordPress, Blogger...